How To Care For Fine Hair

If you have fine hair, you know it can be both a blessing and a curse. On the bright side, your skinny strands don’t need as much product to coat them. Often, fine hair is naturally silky and smooth, and responds to heat styling easily.

But the downsides, on the other hand, are all too real. From tangles to lack of volume, fine hair sometimes takes some finagling to look great. If you’re frustrated by all the bombshell blowouts you see on the runway, you’re not alone. But the good news is: with the right routine, care, and products, you can whip your fine hair into shape!


What is Fine Hair?

Fine hair describes your hair’s texture, which is classified in terms of the width, diameter or circumference of the actual hair strands. If you have fine hair, your individual strands are smaller in diameter, while coarse hair has a thicker diameter.

Note: Not sure what type of hair you have? A simple hair texture test can give you the answer. Pluck a strand of hair and rub it between your fingers. If you can’t feel it, your hair strands are fine. If you can feel it between your fingertips, you have medium hair. If it feels thick and coarse, you have coarse hair.


What’s the Difference Between Fine and Thin Hair?

When you run your hands through your hair, does it feel like there’s not much there? Keep in mind this doesn’t necessarily mean you have fine hair — it may just be thin.

While similar sounding, these are different qualities or traits that hair can have. “Fine” hair references the thickness of the strand, as with the texture test we described above. Having “thin” hair references the density of the follicles, or how close individual strands are to each other. It’s entirely possible to have hair that is both fine and thick, or coarse and thin. If the concept is still confusing to you, think about this: When men are balding, the concept used to describe the hair is “thinning” because they have less densely populated hair in a particular area.


How to Care for Fine Hair

Fine hair can be easily cared for with the right products for your hair type. As always, it’s best to start in the shower. To avoid limp strands, wash every day to every other day with a volumizing shampoo. When you’re ready for conditioner, this is where it gets tricky. While you want to keep you locks conditioned, of course, overly-moisturized hair can end up flat and lifeless. If your roots get greasy fast, as fine hair tends to do, minimize the amount of conditioner you use and focus on the ends rather than your roots. You can also master this balancing act by using a leave-in treatment that will help repair, restore, and detangle your locks. Spray this on after your shower, and again, focus on the ends instead of the roots.

After your shower, keep in mind that hair is much more susceptible to breakage when it’s wet — especially fine hair! Pat the moisture out of your hair with a towel rather than vigorously rubbing it. Avoid brushing your hair while it’s wet for the same reason. When time allows, let your hair air dry to prevent heat damage. If you must use heat, use a low temperature — and don’t forget to apply a heat protectant first!

The old adage “you are what you eat” applies to your hair, too. Be sure to add biotin-rich foods into your diet, like nuts, bananas, and egg yolks. If you don’t think you’re getting enough biotin from diet alone, supplements are also an option.


Common Fine-Hair Concerns

Maintaining and styling fine hair presents unique challenges. Here are a few of the common concerns, and how to combat them!

Tricks for Tangles

  • Condition hair well. Ensuring your hair is properly moisturized is the best way to keep tangles at bay. The softer the hair strand, the less likely it will intertwine with other strands. Once a week, try a deep conditioner to boost your strands.
  • Minimize blow drying. Allow your hair to mostly air dry before bringing out the blow dryer. Blow drying strips the hair of essential oils and dries it out, causing it to tangle more easily.

Tricks for Greasiness

  • Wash your hair every day. Unlike with other hair types, this is a must-do to combat greasiness.
  • Use a sulfate-free shampoo that doesn’t strip your hair of essential moisture.
  • Apply products from mid-length to your ends. Many products are too heavy for fine hair, especially when applied to the roots.
  • Dry your hair 100% before leaving your house. Not doing so can add to the illusion of both greasy and lifeless hair.
  • When in doubt, keep your dry shampoo handy! A quick spritz can refresh styles in an instant.

Tip:Apply dry shampoo at night, not in the morning. This will give it more time to absorb excess oil, and any tossing and turning you do will give your hair more texture and volume the next day.

Tricks for Flat, Lifeless Hair

  • Blow dry your hair upside down.
  • Limit brushwork. Don’t sabotage your volume by brushing your hair too much. Too much brushwork can make your hair limp. Also, dry your hair at least 90% with your hands before going at it with your round brush.
  • Ease up on products. When it comes to fine hair and product usage, remember: less is more. This rule applies to conditioner application, as well. Too much product will weigh down your hair and make it look greasy.
  • Don’t sleep on wet hair. Unlike your coarse hair counterparts, fine hair doesn’t bounce back from a good night’s sleep on wet hair, mostly because fine hair doesn’t bounce to begin with. Sleeping on wet hair will kink, requiring you to style it using heat, which defeats the purpose of sleeping with wet hair.

Best Haircuts and Styles for Fine Hair

The foundation for beautiful hair includes great products and a great cut! In general, the best haircuts for fine hair are shorter. This is all thanks to gravity: if your hair doesn’t have natural volume, extra weight will only weigh it down more. If you’re not willing to sacrifice your length for volume, have no fear, there are haircuts that make movement and dimension still possible.

Here are a few ideas for hairstyles for fine hair:

  • Bob
  • Long bob (or “lob”)
  • Long layers
  • Wispy bangs (avoid heavy bangs!)
  • The popular ombre coloring technique can also add depth and dimension to fine hair, so it’s a great option.

After you find the best haircut for your fine hair, the next step is learning how to style it. The biggest hurdle people with fine hair face is achieving full-bodied and voluminous locks. The good news, though, is fine hair is one of the best hair types to have because it’s both manageable and malleable! With certain blow-drying techniques, quality volumizing hair products, and the right cut, all your hair goals can be achieved.

Add volume, or at least the illusion of volume, with these styling tips for fine hair:

  • Switch up your part. A deep side part can give the illusion of fullness, while a jagged part makes the top layers stick up, giving the illusion of thicker hair. Either option adds an instant boost to transform your tresses.
  • Add waves. Hair looks fuller when worn wavy. Transform your naturally limp locks into gorgeous tresses with the use of a curling iron. Adding volume to the sides gives the illusion of fuller hair.
  • Half updo or bun. This hairstyle gives you the opportunity to gently backcomb your hair to achieve the height of an updo, boosting volume with smart styling.

How To Care For Thick Hair

Thick hair is often viewed as the ideal type of hair to have, but those who were born with a full head of thick, luscious locks are definitely familiar with the struggle of managing their mop. Sure, having volume is great and there are tons of options for creating versatile hairstyles, but what about the constant frizz and the time it requires to style that hair? If you’re struggling with the upkeep of thick hair, not to worry, we have crafted an entire guide of everything you need to know about caring for your thick mane.


PRODUCTS

Thick hair tends to be more on the dry side of the hair spectrum, so it’s important to use products that keep your hair hydrated and keep the frizz at bay. If you’re a thick haired babe who’s struggling to keep her hair tamed below are our top product recommendations.

Why does frizz happen?

Before diving into which products to use to tame frizz, it’s important to understand why frizz happens. Frizz is caused when the outer layer of your hair cuticle is lifted, causing moisture to pass through and swell the hair strands. When the cuticle is flat and not raised, the hair strands remain smooth and frizz free.

This lifting of the cuticle can be caused by multiple reasons, but the most common reason for thick haired ladies is dry hair, leaving the hair cuticles more prone to lifting. Let’s say you have thick, dry hair, and you go outside when it’s humid…what happens to your hair? Because your hair is dry and the outer layer of your hair strands are lifted, moisture from the air will rush into your hair strands causing each strand to swell, resulting in big, frizzy hair. So, how do we combat this?


HAIR OILS

If you’re a thick haired gal suffering from dry hair, hair oils are going to be your best friend. The key to maintaining frizz is keeping your hair strands moisturized and nourished, which can be obtained with a few different types of hair oils.

COCONUT OIL

Coconut Oil has moisture retaining properties. It stays inside the hair, moisturizing the hair strands from the inside out, making it one of the most effective hair oils for frizzy hair. Coconut Oil is best used as a moisturizing hair mask. Simply coat your hair with the oil from root to tip, pop a shower cap on, and leave the oil to do its work for about 20 minutes. Then, rinse off your hair, shampoo and condition as normal, and enjoy smooth, moisturized, frizz-free hair.

ARGAN OIL

Argan oil, also known as Moroccan Oil, is packed with beneficial nutrients like vitamin E, ferulic acid, fatty acids, and antioxidants. Just a few drops of Argan Oil will give your hair that extra boost of moisture to help fight dryness and frizz. Argan Oil is also not as greasy as Coconut Oil, so it’s perfect to use every day as a finishing oil.


HOT TOOLS

When it comes to choosing the right hot tools, it is important to choose the right hot tool for your hair type. Contrary to popular belief, not all hair dryers, straighteners, or curlers are made the same way, and certain materials are more beneficial to maintain the hair’s integrity as well as prevent the hair from drying out. Ever wonder why professional hot tools cost so much more than your run of the mill drugstore brand or why your hair always looks that much smoother and shinier when you leave the salon? It’s because your hair stylist has invested in higher grade hot tools, which you should too!

IONIC HAIR DRYER

If you have thick hair, you’ll know the struggle of washing your hair and spending the next hour fighting with it to dry and style it. An ionic hairdryer cuts down hair drying time for thick hair, by using negative ions to break down water droplets on wet hair, leading to dry hair fast, while controlling frizz and boosting shine.


HAIR MASKS

Again, thick hair is usually much more prone to drying out, as the natural oils are unable to travel all the way down the hair shaft. This is why if you have thick hair, the ends of your hair will likely suffer from dryness naturally—especially if your hair strands are thick as well. Experimenting with a DIY hair mask is an inexpensive and convenient way to bring moisture and luster back to your tresses. Masks are important for every hair type, thick-haired girls included!


DIET CHANGES

Luckily girls with thick hair don’t need to make many adjustments to their diet to help thicken their hair any further or grow more hair, but it’s never a bad idea to focus on eating foods that contribute to your overall hair health. Just because you have thick hair doesn’t necessarily mean it’s healthy! Follow along for a few tips and recommendations that you can incorporate into your diet to keep you thick hair looking luscious for longer.

OMEGA-3 FATTY ACIDS

Omega-3s are found in many types of fish, as well as from plant-based sources like nuts and seeds and is one of the best nutrients for strengthening hair, skin and nails. For thick haired gals, Omega-3s can do miracles for adding shine, minimizing breakage and strengthening the hair follicles. Click here to learn more about Omega-3s and their benefits to your body.

B VITAMINS

Biotin, vitamin B12 and B6 are all essential for maintaining healthy locks. Whole grains, almonds, meat, fish, seafood and leafy greens are all strong sources of these vitamins and are important to support hair health. Often people don’t get enough of these vitamins in their diet will see hair loss and this is where supplements can be useful.


HAIR HABBITS

Typically, girls with thicker hair tend to require quite a little more maintenance to keep their heavy locks looking sleek and tamed. Often this means more frequent heat styling or heavy product use, which can result in dried hair and fried ends. To keep your thick locks healthy and luscious, follow along for our go-to healthy hair habits.

ADD LAYERS

Adding layers is one of the first steps thick-haired girls can take to making their hair more manageable. Adding layers gives the hair natural body and movement and also thins out the hair to help tame it and give it shape.

DO FREQUENT HAIR MASKS

Hair masks are a healthy hair habit that all girls should incorporate in their self-care routine, but especially those with thicker, coarse hair! As mentioned earlier, the natural oils in thick hair are unable to travel down the entire length of the hair, leading to dry hair, especially at the ends. This leads to frizzy, unmanageable hair, which a hair mask once a week can help fix.

CUT BACK ON WASHES

This is actually a healthy hair habit that most girls should practice, but it is easiest to do if you naturally have thick hair. Since thicker hair tends to lean more on the dry side than the oily side anyway, you can get away without washing your hair for multiple days in a row before your hair starts actually looking oily. Washing your hair too often can actually strip the natural oils from your hair, leading to a cycle of dry hair, so if you’re struggling with dryness, it’s a good idea to cut back your washes as much as possible (even to once a week if you can!) in order for your hair’s oils to balance out. And hey, if you’re struggling with oily roots, there’s always dry shampoo to get you by!

LEARN HOW TO PERFECT A BLOW OUT

The perfect blowout will save a thick haired girl from having to use multiple heat products on their hair. We know the struggle of blow drying, straightening and then curling to get your locks in tip top shape, but learning how to master a blowout can knock out a few of those steps and leave you with sleek, voluminous locks.

HAIRSTYLES

One of the biggest blessings of having thick hair is the huge variety of styles that you can create that girls with thinner hair might struggle with! From braids, updos and half-up styles, you can try any or all of the above with your thick tresses. If your hair is just too thick to manage for the day, try a beautiful fishtail braid. If you’re feeling fun but need to alleviate some thickness, throw half of it up! The hairstyle possibilities are endless with thick hair…lucky you!

How To Get The Perfect Messy Waves

Of all the mysterious, maddening hair fantasies we see on the runway during Fashion Month, effortless messy waves are the most perplexing. For starters, anything described as effortless usually takes an absurd amount of effort—or at least some secret know-how. Once you factor in the length, texture, and “to heat-style or not to heat-style” variables to the equation, you’ve got a complex hair problem worthy of a team of scientists and a whiteboard.

Since we take our own hyperbole seriously, we’ve collected the best ways to get peak effortless waves with and without hot tools.


How To Get Messy Waves Without Any Heat

If you deal with breakage on the daily and don’t want to risk heat styling, you can still get in on the messy waves action. Begin with totally dry hair and ready lots and lots of firm-hold mousse. Rake the mousse through your hair with your fingers, starting at the mid lengths (if you start at the roots, you’ll get wet-look hair; cool if you want that, but FYI in case you don’t) and work your way down.

Next, fold sections of your hair upwards at about one-inch intervals, then gently squeeze. It feels a little funny at first and you might feel compelled to overthink it, but it’s really that easy. Once you’ve folded your hair into waves you’re happy with, set them in place with flexible hairspray. Done and done.


How To Get Messy Waves With A Curling Wand

The trick to getting that awesome undone look with a curling wand is all in the way you work the barrel. Start by holding the barrel of your wand vertically—and partially wrap one-inch sections of your hair around the wand to shape it. Give the look just the right amount of piece-y finish by raking your hands through the waves and setting them with a dry conditioner. Lastly, run a texturizer throughout the length of your waves. Pro tip: Rub the gel between your hands first to warm up the product. It’ll help disperse the gel through your hair more easily.

As for short hair, the approach to creating soft, natural waves is more or less the same with one major difference: your tools. We recommend using a one-and-a-half-inch barrel wand, again held vertically when curling. Start each section midway down and leave your ends straight to create more modern wave.


How To Get Messy Waves With A Flat Iron

Warning: When a pro stylist even tells you getting waves with a flatiron is harder than it looks, it means you’re going to need to give yourself the time to practice. First, it’s crucial that you’ve got a straightener that easily glides through your hair. One with beveled edges that will help since your hair won’t snag at the sides when you rotate the iron. Next, you want to twist the iron up and down, making sure to changing the direction the iron is pointing. When the iron bevels up, the top of your iron should be pointing up, and when it bevels under, the top of your iron should be pointing down. The finished result is a looser, more ’70s finish than you’d get with a curling iron. But just as cool.

Why Is My Hair Breaking?

Hair breakage has many different causes. Healthy hair depends on an inner cuticle with overlapping scales that keep your strands together. When these scales fall apart, your hair can get dry and eventually separate, leading to damage. This causes breakage, along with other symptoms, such as frizz and dryness.

Learn more about some of the most common causes of hair breakage and what you can do about them.


  1. Diet

There’s actually a lot to the old saying “you are what you eat,” especially when it comes to hair health. Certain nutrients help your hair grow and stave off breakage from damage. Make sure you’re getting enough zinc, iron, and folic acid in your daily diet. Adequate protein and antioxidants (found in plant foods) can also keep your hair damage-free.


  1. Stress

There’s a multitude of evidence showing links between stress and hair loss, but it’s also known that stress can lead to hair breakage. Telogen effluvium is the type of stress most likely linked to hair damage. This type of stress makes your follicles go dormant, so hair that’s in the middle of a growth cycle may break off. You might notice old hair fall out, too. Managing your stress may result in healthier hair.


  1. Dryness

Unusually dry hair is one of the precursors to damage and breakage. It’s also caused by a variety of factors, including dry weather, low humidity, and too much heat. Be sure you use warm and not hot water when you wash your hair — the latter leads to further drying.

If your ends are dry, consider concentrating shampoo on your scalp only. Skipping conditioner is also a no-no. If you’re pressed for time, spritz on a leave-in conditioner before combing wet hair.


  1. Heat damage

To get the best results from your hair dryer, flat iron, or curling iron, you need high heat. However, when you use these tools incorrectly or too much, you risk damaging the cuticle from extreme temperatures.

One way to prevent overall heat damage is to give your strands a break from all styling tools at least once a week. To reduce the actual heat damage from your styling tools, select ceramic versions — these heat up more evenly so you don’t have to keep using them on the same sections of hair repeatedly. It’s also important to protect your hair before you apply the heat.


  1. Over-processing

Perms, relaxers, professional straightening, and coloring can all make your hair seem like it’s healthier after the first session or two. But if you do these services too often, the cuticle can break down and cause hair damage.

The American Academy of Dermatology (AAD) recommends extending the time between your sessions to 8–10 weeks, if possible. In the meantime, try a hair mask to extend your results, such as this color-protecting mask.


  1. Over-washing

If you have oily skin, you’re also more likely to have excess sebum (natural oil) production in your scalp. This can lead to the temptation to wash your hair more often than you need to.

While daily washes are fine if you have oily hair, you shouldn’t wash your hair multiple times per day. On the flipside, extremely dry hair may only need weekly shampooing, according to the Nemours Foundation. Also, be sure you shampoo gently at the scalp and apply conditioner smoothly from your ends to your roots. If you need extra oil reduction during the day, try out Living Proof’s Perfect Hair Day Dry Shampoo.


  1. Improper towel drying

When you step out of the shower, it’s a natural response to rub a towel on your skin and hair. However, this rubbing motion actually damages your hair when it’s most vulnerable (after being wet). Instead of rubbing water out of your hair, blot an absorbent towel around your hair instead. You can also leave a towel in your hair as a temporary measure to absorb excess water.


  1. Elastic hair ties

Elastic hair ties are must-haves for keeping your hair out of your face while working out. And, let’s face it, they can come in handy on bad hair days or when you’re in a hurry.

The problem with hair ties is they pull on your scalp and hair cuticle. You may even notice some hair falls out every time you undo your ponytail. You can fix this by wearing your hair down once in a while, or by making your up-do a bit looser so it doesn’t pull on your hair so much. Also make sure you’re wearing real hair ties, and not just rubber bands that can damage your hair.


  1. Incorrect brushing and combing

You may have heard that brushing your hair 100 strokes a day is good for your hair, but the AAD says that’s simply a myth. They recommend that you instead only brush and comb when styling your hair. Make sure you used wide-tooth combs to prevent breakage. You should also only use a brush for when your hair is dry, and avoid using plastic bristles. Try a brush with natural bristles instead.


  1. Lack of hair trims

It may seem like cutting your hair can damage it. Ironically though, hair trims help keep your hair healthy and free of split ends. You can think of a hair trim like you would exfoliation for skin — in both instances, you need to remove some of the old cells to help new ones grow. When you have split ends, these splits in the cuticle can travel up the rest of the length of your hair and lead to breakage.

See your stylist at least every eight weeks. Even if you’re growing out your hair, trimming damaged ends can prevent further breakage.


  1. Hypothyroidism

Hypothyroidism (low thyroid disorder) occurs when your thyroid gland doesn’t produce enough thyroid hormones. Although the thyroid itself is small in size, it plays a large role in keeping your body functioning. This includes your metabolism, heart rate, and even your hair growth.

People with low thyroid might notice excessive hair damage and loss, especially in the shower or after brushing. If you have dry, damaged hair combined with low energy, sudden weight gain, and depression, see your healthcare provider for a thyroid check. Learn more about the effects of hypothyroidism on the body.


  1. Eating disorders

If you or a loved one has an unhealthy relationship with food, hair damage is a possible symptom. This is especially true of eating disorders that cause malnourishment, such as anorexia and bulimia nervosa. In such cases, hair follicles don’t have the nutrients they need to produce new hair and the process is terminated altogether. You may even notice new hairs that break off in the middle of the growing cycle.

Eating disorders can lead to even more serious consequences and require medical treatment. Reading personal stories of those who have overcome eating disorders may help inspire you or your loved one to seek treatment.


Tips for Healthy Hair

To prevent future hair breakage, consider the following must-do hair care tips:

  • Wash and condition your hair daily, but gently.
  • Use a swimmer’s shampoo and conditioner set after going to a pool.
  • Try to let your hair air dry when possible.
  • Make sure all weaves and extensions are light so they don’t pull on the scalp.
  • Consider a new hair style that requires less damaging maintenance on your part.
  • Eat a balanced diet to make sure your hair gets all the nutrients it needs.
  • Avoid wearing tight hats for fashion — save these for sun protection only.


The Takeaway

Hair breakage can be frustrating. The good news is that most underlying causes may be corrected with lifestyle changes. If you still experience hair breakage after making changes to your diet and hair routine, it may be time to see a healthcare professional to rule out any underlying medical issues.


Ref: www.healthline.com


Why Isn’t My Hair Growing?

Does it seem as if your hair isn’t growing? Well, most likely, it is (if it truly isn’t, there may be an underlying health reason, in which case you should consult a doctor). But if your hair breaks off at an equal or higher rate than it grows, you’ll never see any length gains.

Hair may show stagnant or negative growth rates for a number of reasons. Do any of these sound familiar to you? Because if they do, it’s imperative to break these bad hair habits and begin promoting healthy practices that allow you to keep every inch of growth possible.


CHEMICAL OVERPROCESSING

Overlapping relaxers, aggressive bleaching and applying too many chemicals to hair are all prime culprits in damaged hair. Damaged hair will still grow from the scalp, but it often breaks off at the ends or requires a drastic cut to get rid of unhealthy sections. Ask yourself if you:

  • Relax/texturize/color your mane at home
  • Have a chemical straightening process and color
  • Have a hair color at least two shades lighter than your natural shade
  • Relax more often than recommended
  • Applied a relaxer or texturizer over previously straightened locks

If you answered yes to any of these, it’s possible that your hair is over-processed. Although stylists aren’t always foolproof, it’s usually better to receive chemical services in a salon at the hands of a capable professional.


TRIMMING TO OFTEN

You can have too much of a good thing, and trims fall into this category if you want longer hair. Many women resort to trimming their own hair at home after suffering the results of a scissor-happy stylist. Healthy hair doesn’t require as many trims as unhealthy tresses; the less you do to your hair, the less likely you’ll need frequent trims that take off an inch or more.

Hair grows an average of 1/4 to 1/2 inch per month, so if you care for your hair properly, you don’t need to cut more than 1/2 inch every few months or so if you want to see growth. When you do trim your tresses, be sure to use shears designed for this process, and not dull household scissors that perform multiple tasks, from cutting craft projects to gift wrap paper.


LACK OF CONDITIONING

Dry, brittle hair can happen to anyone if they are not diligent about conditioning. If you’re not currently:

  • Applying a moisturizer as needed, whether once a day or several times per week
  • Deep conditioning at least twice per month, preferably with heat
  • Conditioning after every shampoo
  • Applying a leave-in conditioner after a shampoo/condition session …

You may need to start. The more moisturizing products and practices you use, the better conditioned, and less likely to break, your tresses will be.


POOR PROTIEN STRUCTURE

Along with a good moisture level, hair needs a suitable protein balance to remain strong. The more chemicals or harsh practices that your mane goes through, the more important protein becomes, simply because every relaxer/touch-up, color, and even flat iron press compromises the strength of your strands’ cuticles.
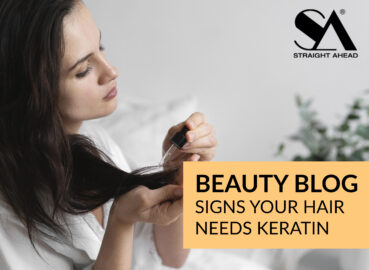
Weak hair usually breaks, after becoming thinner and less elastic over time. Because hair is comprised of protein, it needs protein in some form or other. As long as you follow a healthy regimen, you won’t need as much protein as someone who doesn’t, but a little protein helps most women maintain strong tresses.


AGE

Aging brings with it a host of life complications, not the least of all is our hair. As we get older, chances are our hair is weaker. Years of heat styling and bleaching can build up to create major damage. Additionally, oil production on the scalp often begins to slow down after age 45, so hair may be less hydrated and appear coarser, making it more susceptible to damage and breakage.

How To Properly Care For Your Hair Tools

With the right maintenance and care, your tools will work, and keep your hair looking good, for many years to come.


BLOW DRYER’S

Take your blow drier and take a look at the back where the vent is. See that? That’s lint…and dirt. Most likely completely covering the filter. Unless yours is brand new or recently cleaned, a clogged-up blow dryer is something a lot of us are guilty of. All this built up dirt and lint blocks the ventilation a blow dryer needs to work properly and safely.

Step 1: Remove the back cover (it usually easily twists off – if not, consult your instructions manual).

Step 2: Take out the filter and clean it out with some small tools (Q-tips, toothbrush, toothpick, tweezers, etc.). Then, rinse with warm water and let it dry completely. If you do not see a way to get to your filter on your blow dryer refer to your instructions manual on how you can clean it.

Step 3: While that’s drying, give your blow dryer some love and rub down the nozzle and body with a damp cloth to clean any build-up of hair products.


FLAT IRON’S & CURLERS

Don’t let the sticky product buildup on your curlers and flat irons burn your hair and cause split ends! To keep your hot tools in great condition, it’s important to clean them well in order to get rid of that residue.

Make sure they are unplugged before starting. Moisten a cloth with water and rub over the surfaces over and over again to get rid of as much buildup as possible. If water doesn’t work, add a little rubbing alcohol (or a professional iron cleaner, if you’d like). Dry the hot tool entirely before using.

Tip #1: the product buildup comes off easier when the hot tools are warm (not hot). To achieve this, plug the tool in for a few seconds and remember to unplug before starting to clean.

Tip #2: Remember to never submerge your curlers and straighteners in water – this is both dangerous and will ruin your iron.


BRUSHES

Think about what gets stuck in your hair brush (other than hair, of course): dust, hair spray, oils from your scalp, other product residue, germs, other random particles flying around. Now think about what happens when you don’t clean it for weeks! Do you really want to brush all that onto your freshly washed hair? We don’t think so.

Step 1: Take any long, thin tool (rat tail comb or a pair of closed scissors), slide it under all the stuck hair in the brush, and gently tug upwards until it’s loosened out of the bristles. Of course, if there isn’t that much hair, you can easily pull out whatever is left with your hand, after each time you brush your hair.

Step 2: Now onto the washing. Fill up the sink with warm water and splash some cleansing shampoo. Either let it soak for a bit, or take an old toothbrush and gently get rid of the buildup at the base of the brush or comb.

Step 3: Done! All clean. Either let the hair brushes air dry, or use a blow drier for a faster result. Some brushes may take longer to dry, so perhaps it’s a good idea to leave them to dry overnight.


HAIR ACCESSORIES

Remember your headbands, hair ties, scrunchies, and hair clips! They also have hair product buildup, as well as potential sweat and pollution from the outside. Once in a while, throw them all in the sink with warm water and a few drops of shampoo. Gently rub each accessory and then dry them on a towel.

Remember, the better you care for your hair tools, the better they care for your hair!

How To Get The Perfect Blowout At Home

A gorgeous blowout is a like a work of art. The look appears effortless, but behind the smooth, shiny locks is a great deal of technique that probably took a lot of time and practice to perfect.

If you’ve ever tried to give yourself a salon-quality blowout at home only to stop midway through out of fatigue and frustration, take heart. This seemingly elusive skill can be mastered. With a little patience and the right blowout tips, you’ll be able to get a salon-quality blowout from the comfort of your own vanity.

USE A COMFORTABLE HAIR DRYER

A hair dryer doesn’t need to be a big splurge. The most important quality in a hair dryer is how comfortable it feels in your grip. Next, make sure it comes with a tapered nozzle attachment and a cool setting like our V3600 and V3800 professional blow dryers.

FIND THE CORRECT SIZE ROUND BRUSH

The right size round brush will depend on the length of your hair. The longer the hair, the bigger the round brush. For short hair, try a 1.5-2” brush; for medium: 1.5-3”; for long: 3-5”.

BEGIN WITH BLOWOUT FRIENDLY PRODUCTS

The perfect blowout begins in the shower. Wash your hair with a volumizing shampoo. Then, apply a light conditioner, like our Rejuvenating Argan Oil infused conditioner, to only your ends to avoid weighing hair down.

Apply a heat-protectant like our Rejuvenating Argan Oil infused hair serum, which can help protect hair from heat damage. Next, apply a volumizing mousse to your roots that provides flexible hold and body.

PRE-DRY YOUR HAIR TO CUT DOWN ON BLOW DRYING TIME AND BUILD BODY

Using your fingers, lift a section from the top of your head and pull it taught. If you have thick or coarse hair, use the hottest setting on your drying. If your hair texture is medium or fine, use the medium heat setting.

Using the full-speed heat option, direct the heat towards your roots, where you want the most volume. Repeat until your hair is between 30-70% dry (those with curlier textures will want less pre-drying while those with straighter textures can get away with more).

DRY IN SECTIONS

Use clips to separate hair into four sections: One at the crown, one on each side, and one in the back. Sections may be subdivided or customized depending on the length and thickness of your hair.

• From each section, take a 1½” portion of hair.
• Pull it taught with a round brush using 1/4″ turns of the brush.
• Gently pull the hair up as you dry; avoid pulling hair down. (This builds volume).
• Use the hottest setting on your dryer if you have very thick or coarse hair. Use the medium heat setting otherwise.
• The dryer may be switched to its lower speed setting if that option is available.
• Keep the airflow parallel to the section being dried. (Use the dryer nozzle attachment to avoid roughing up the hair cuticle and creating
additional frizz.)
• Repeat drying steps with each portion of hair until completely dry.
• Set each dry portion with a blast of cool air.

MISTAKE TO AVOID

Over-twisting the brush.
Avoid completely twisting the brush near your scalp. This can create unfortunate tangles. To catch your hair on the brush, do a small quarter-inch turn. Holding your hair taught with the brush, bring the brush down to the midlengths of the hair and then begin turning.

Holding the dryer too close.
Hold the dryer at least one inch above the hair. Pressing the dryer nozzle against hair can cause dryness and damage.

Going too fast. Patience is key!
For a sleek, no-frizz blowout, hair must by completely dry. Furthermore, being slow and methodical will allow you more control over the final outcome of the style.

Mastering the Perfect Beach Wave

Still trying to get those sexy, beachy waves? Here are some tips to help teach you how to master the wave.


  1. GET THE RIGHT HAIR CUT

We all know that thick, blunt, and/or split ends won’t hold a curl, but did you know the kind of cut you have makes a difference, too? Make sure to ask your stylist to strategically cut long layers around your face, and only add subtle layers to the back of your hair for volume.


  1. SKIP THE SHAMPOO

It’s no secret that dirty hair is easier to style, but making your hair look fresh after skipping a hair wash takes skill.


  1. ADD SOME TEXTURE

One of the most helpful tricks to get your hair to hold a style is to give it some volume, which is a lot easier to do than you may think. If you’re working with unwashed hair, simply spray some dry shampoo and – BAM! – you’ve given it a little ooompf, while also removing any excess grease from your roots. On those days when you simply CANNOT skip the shampoo, try using a volumizing mousse before you blow-dry your hair.


  1. DO NOT BLOW-DRY YOUR HAIR UPSIDE DOWN

It’s an old wives’ myth to blow-dry your hair upside down to give it added body. Instead, it’s better to tilt your head to the side and roughly blow-dry it with a paddle brush.


  1. GET OUT THE LARGE, ROUND BRUSH

Once your hair is about 80% dry, section it off into 3 layers and finish drying it with a large, round brush. You don’t need to spend a lot of time on this part of the styling process since the goal isn’t to straighten the hair. All you want to do is give it a smooth look and make sure it is completely dry before you get out the flat iron or curling iron.


  1. APPLY A HEAT PROTECTOR

Regardless of what kind of coating you have on your flat iron or curling iron, you MUST apply a heat protector to your hair to ensure you don’t damage it.


  1. CURL IN SECTIONS

To get beach waves, divide hair into 3 sections, and curl from the bottom up. Make sure to apply your heat protector to each layer, and spray a bit of hairspray to ensure the curl holds.

Of course, working with layers can be tricky as you don’t want to accidentally brush or ruin a fresh set of curls, so when you’re finished curling each layer, spray it lightly with a little more hairspray and pin it in place before letting down the next layer of hair.


  1. ALTERNATE DIRECTIONS

To make your style look more natural, ensure to curl the front sections of your hair AWAY from your face, and then alternate the direction of each subsequent section. For beachy waves, try to curl in 1-inch sections, but you can increase or decrease this depending on how tight or lose you want your curls to be.


  1. CURL ALL THE WAY TO YOUR SCALP

Curls tend to loosen as the day progresses, so if you start with a tighter curl, your look will last longer. If you find your curls are too tight, and they aren’t loosening to your satisfaction, all you need to do is rub a REALLY SMALL amount of shine serum to your hands and lightly run your fingers through your curls and pull them down to open them up a little bit.

How To Remove Unwanted Facial Hair

Hair growth can occur due to hormonal changes or it may be caused by genetics. If you’re bothered by the hair that grows on your face, follow these tips to remove unwanted facial hair:


SHAVING

Shaving is one of the fastest and easiest ways to remove hair. Whether you’re using a disposable shaver or an electric shaver, both have a built-in blade that lifts and cuts hair at the skin’s surface. Shavers can work on different parts of the body however, the results aren’t permanent or long-lasting. Your face will remain hair-free for one to three days, and then you’ll have to re-shave.

Keep in mind that while this method is relatively safe, ingrown hairs can be a side effect of shaving. These small bumps develop when hair grows back into the skin. Ingrown hairs usually improve on their own within days.


TWEEZING

Tweezing is another effective and inexpensive way to remove facial hair. This method works slightly differently than shaving. Instead of removing hair with a razor blade, tweezers are designed to pluck or pull hair from the roots.

Tweezing works on any facial hair. It’s particularly useful when shaping the eyebrows. Typically, the results of tweezing last longer than shaving — up to three to eight weeks.

Be sure to disinfect your tweezers with alcohol before and after plucking. Like shaving, tweezing can also cause ingrown hairs.


EPILATION

Epilation is another option for removing facial hair. This technique can eliminate hair for up to four weeks, which might be a better choice if you’re busy and don’t want to regularly shave or tweeze.

Epilators work similar to tweezing and shaving. The difference is that epilators eliminate facial hair by grabbing multiple hairs at the same time and removing them from the root. Because hair is removed from the root, it takes longer to grow back. Sometimes, epilation results in hairs growing back softer and finer. Strands may become less noticeable.

You may only think of epilators when removing hair from the legs or from larger areas of the body. But epilators come in multiple sizes, making them ideal for eliminating hair on all parts of the body.

You don’t have to prepare your skin when using an epilator. However, exfoliating a couple of days before helps soften the skin and reduce the risk of ingrown hairs.


AT-HOME WAXING

Waxing is an effective way to remove all the hair in an area. There are two different types of waxing kits: wax strips that you warm between your hands before applying and

wax that’s melted in a warmer and then applied to the area with a stick. When you’re shopping for wax, look for soft wax, or wax that’s formulated for using on the face. Hard wax is better for your legs and bikini area.

If you choose wax that needs to be warmed at home, purchase a wax warmer. A wax warmer will heat the wax evenly and allow you better control over the temperature. Also, make sure to purchase plenty of waxing sticks to only use each stick once. “Double-dipping” can introduce bacteria into the wax and may cause a skin infection.

Before you wax, do a patch test on your skin to see if you develop an allergic reaction, and to make sure the wax is the right temperature. The wax shouldn’t feel uncomfortably hot. It should easily glide over your skin.


AT-HOME LASER HAIR REMOVAL

The main problem with many hair removal methods is that results are temporary or only last a few weeks. For longer results, consider laser hair removal. This method uses a laser and pulsating beams to damage hair follicles, resulting in the loss of hair. It’s a semi-permanent solution — hair grows back after about six months. Sometimes, hair never grows back. If hair returns, it may be finer and unnoticeable.

Laser hair removal can be expensive. Achieving desired results typically requires multiple trips to a doctor or spa. If you want the benefits of laser hair removal without the expensive price tag, one option is buying an at-home laser hair removal kit. At-home treatments are cost-effective and convenient. You’re able to complete hair removal treatments around your schedule in the comfort of your home.

Laser hair removal can be performed anywhere on the face, such as the upper lip and chin. But you should avoid lasers when removing hair from around the eyelids and surrounding areas.


DEPILATORY CREAMS

Depilatory creams are another option for facial hair removal. The results can last longer than shaving and these creams may be cheaper than waxing.

These creams have chemicals such as sodium, titanium dioxide, and barium sulfide, that breakdown proteins in hair, so that it easily dissolves and washes away. Although these ingredients are generally safe, there is a risk for reaction.

If it’s your first time using a depilatory cream, do a patch test first and apply a small amount of the cream to your skin. Signs of a reaction include skin redness, bumps, and itchiness. Wait at least 24 hours after a patch test before applying the cream over larger sections of your face.


THREADING

Threading is another option for shaping eyebrows and removing unwanted facial hair on the upper lip, side of the face, and chin. This method uses a thread, which pulls and twists unwanted hair until it lifts from the hair follicle. The results can last longer than shaving or tweezing, plus this method doesn’t cause ingrown hairs.

Threading also doesn’t involve chemicals. So, there’s no risk of a skin reaction, although you may experience minor pain or discomfort as your technician removes hair from the follicles. To reduce pain, ask your technician to apply numbing cream to your face, or apply a warm compress afterward. This method of hair removal requires skill, so you’ll need to find a trained cosmetologist or esthetician.

Threading might not be an option if you have acne, as it can cause bumps to rupture.

Halloween Hair Inspiration

A costume isn’t complete without the perfect makeup and hairstyle to match. With that being said, let these looks from Instagram inspire you!